

Steps for Installing and Replacing a Hydraulic Seal: A Comprehensive Guide
Hydraulic seals are critical components in heavy equipment, ensuring systems like excavators, hydraulic breakers, and industrial presses operate efficiently under high pressure. A failed or improperly installed seal can lead to hydraulic fluid leaks, reduced performance, or costly system damage, risking downtime and safety hazards. Installing hydraulic seals correctly is essential to prevent these issues and extend equipment life. This guide provides a detailed, step-by-step process for hydraulic seal replacement, tailored for equipment owners, technicians, and fleet managers in construction, mining, and industrial sectors. You’ll learn how to replace seals safely, avoid common mistakes, and source quality seal kits from trusted suppliers like JSP Seal Kits. Whether you’re performing breaker seal replacement or maintaining a hydraulic cylinder, these practical instructions will help you achieve reliable results and minimize costly failures.
Why Proper Seal Installation Matters
Incorrect hydraulic seal replacement can cause immediate leaks, pressure loss, or component wear, leading to thousands in repairs and downtime. For example, a misaligned rod seal in an excavator cylinder might trigger a $5000 repair bill and a day of lost production. Proper installation ensures seals withstand extreme conditions—high pressure, heat, and constant motion—while preventing damaged hydraulic seals from compromising system efficiency. By following best practices and using high-quality seals from suppliers like JSP Seal Kits, you can avoid seal failure causes like contamination, misalignment, or material degradation, ensuring long-term reliability and safety.
Tools and Materials Needed
Before starting, gather the following tools and materials to ensure a smooth hydraulic seal replacement process:
- Seal Installation Kit: Includes hooks, picks, and an installation cone for safe seal handling ($20–$100).
- Torque Wrench: For precise tightening of bolts or fittings ($50–$200).
- Clean Lint-Free Cloths and Solvent: To remove debris and old lubricant without leaving residue.
- Hydraulic Fluid: Must match system specifications (e.g., ISO 46 for standard systems).
- Seal Lubricant: Compatible with seal material to ease installation.
- UV Leak Detection Kit: Optional for post-installation leak checks ($100).
- Infrared Thermometer: To monitor component temperatures after testing ($30–$150).
- Replacement Seal Kit: Matched to system specs (pressure, temperature, fluid type) from JSP Seal Kits.
- Personal Protective Equipment (PPE): Gloves, safety glasses, and protective clothing to prevent injury.
Verify that the seal kit includes the correct seal type (e.g., rod seal, piston seal, wiper seal) and material (e.g., Viton for high heat, NBR for standard oils). Using mismatched or low-quality seals risks premature failure.
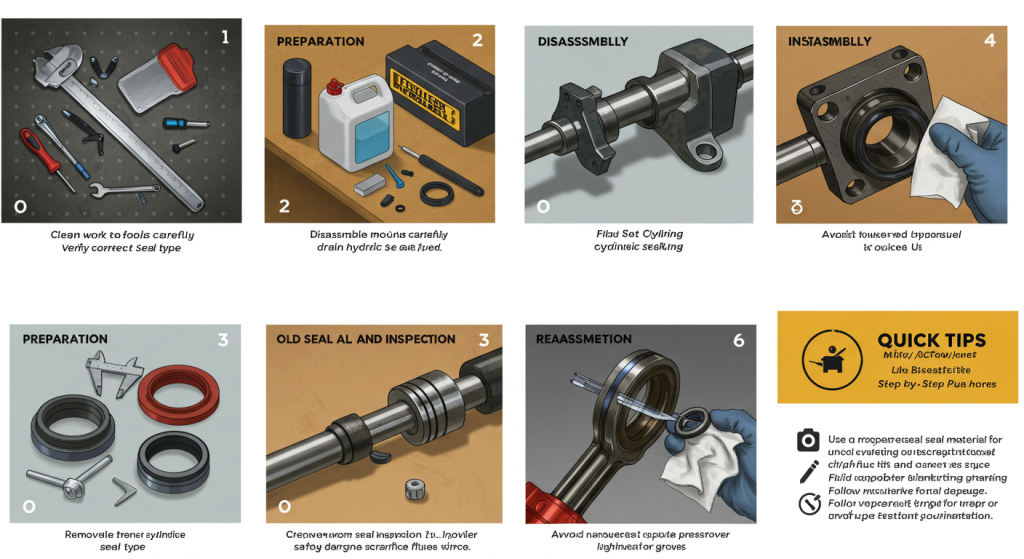
Step-by-Step Guide to Installing and Replacing a Hydraulic Seal
Follow these detailed steps to ensure a successful hydraulic seal replacement. Always consult your equipment’s manual for specific instructions, as procedures may vary by system or seal type.
Prepare the Work Area
Set up a clean, well-lit workspace to prevent contamination, a leading cause of hydraulic seal failure. Lay down a clean mat or cloth to place components on during disassembly. Ensure all tools are free of dirt or burrs that could damage the new seal. Check that the replacement seal kit matches the system’s specifications, including size, material, and pressure rating. For example, a rod seal for a 5000 PSI cylinder must be rated accordingly. Organize tools and materials for easy access, reducing the risk of introducing debris during installing hydraulic seals.
Depressurize and Isolate the System
Safety is paramount when working on hydraulic systems. Turn off the equipment and follow lockout-tagout procedures to prevent accidental startup. Release all hydraulic pressure by cycling valves or opening bleed ports, as specified in the manual. Disconnect the hydraulic component (e.g., cylinder or valve) from the system, ensuring no residual pressure remains. Drain the hydraulic fluid into a clean, labeled container to avoid environmental spills or contamination. Never work on a pressurized system, as high-pressure fluid can cause severe injury or chemical exposure.
Disassemble the Component
Carefully disassemble the hydraulic component, such as the cylinder head or gland, using the correct tools and following the equipment manual’s sequence. Place parts on a clean surface to avoid contact with dirt or debris. Inspect the rod, bore, or housing for wear, scoring, or scratches that could damage the new seal. If surfaces are damaged, polish them with fine emery cloth or replace the component to ensure a proper seal. Document the disassembly order with notes or photos to simplify reassembly.
Remove the Old Seal
Use a non-metallic seal pick or plastic tool to gently extract the old seal from its groove or housing. Avoid metal tools, which can scratch sealing surfaces and cause leaks. Inspect the old seal for signs of hydraulic seal failure, such as cracks, swelling, scoring, or hardening, to identify root causes like contamination, heat exposure, or fluid incompatibility. For example, a swollen seal might indicate the wrong fluid type was used. Clean the seal groove and surrounding area with a lint-free cloth and a compatible solvent, ensuring no debris or residue remains.
Inspect and Prepare the New Seal
Verify that the new seal’s part number, size, and material match the system’s requirements. Common materials include Viton for high-temperature applications, NBR for standard hydraulic oils, and polyurethane for abrasion resistance. Inspect the seal for defects like cuts, tears, or manufacturing flaws—do not use damaged seals. Lightly apply a compatible seal lubricant or clean hydraulic fluid to the seal to ease installation and reduce initial friction. Avoid over-lubrication, which can attract contaminants. Store unused seals in a cool, dark, dry place to prevent degradation before use.
Install the New Seal
Carefully place the new seal into its groove or housing, ensuring correct orientation. For example, lip seals must face the direction of pressure or fluid flow, as specified in the manual. Use your fingers or a seal installation tool to press the seal evenly into place, avoiding twisting or stretching. For tight fits, use an installation cone or hydraulic press, following manufacturer guidelines. Ensure the seal sits flush without pinching or misalignment, which can lead to leaking hydraulic seals. Double-check for gaps or uneven seating, and gently adjust if needed.
Reassemble the Component
Reassemble the component in the reverse order of disassembly, ensuring all parts are clean and undamaged. Replace any worn O-rings, gaskets, or wiper seals during reassembly to prevent future issues, as these components work together to protect the primary seal. Tighten bolts or fittings to the manufacturer’s specified torque using a torque wrench to avoid over- or under-tightening, which can distort seals or cause leaks. Verify that all components are properly aligned to prevent stress on the new seal during operation.
Reconnect and Refill the System
Reconnect the component to the hydraulic system, ensuring all connections are secure and aligned. Refill the system with clean, compatible hydraulic fluid, checking the manual for the correct type (e.g., ISO 32 or 46) and level. Bleed the system to remove air, following the manufacturer’s procedure, to prevent cavitation or pressure spikes that could damage the new seal. Inspect all fittings for signs of leaks during refilling, and tighten if necessary.
Test the System
Start the equipment and slowly pressurize the system to check for hydraulic fluid leaks around the new seal. Use a flashlight or UV leak detection dye with a blacklight to spot subtle leaks. Monitor system performance, such as cylinder movement or breaker impact force, to ensure the seal functions correctly. Listen for unusual noises like whining, hissing, or knocking, which may indicate air intrusion or seal issues. Conduct a pressure retention test: Pressurize the system to operating levels and monitor gauges for rapid drops (e.g., 100 PSI in 30 seconds), signaling improper installation or a defective seal. Use an infrared thermometer to check for overheating (e.g., a cylinder running 20°C above normal), which could indicate friction from a misaligned seal.
Document and Schedule Maintenance
Record the replacement date, seal type, part number, and any observations (e.g., old seal condition) in a maintenance log to track history and predict future replacements. Note any underlying issues, like contamination or worn components, and address them to protect the new seal. Schedule regular inspections as part of a hydraulic maintenance checklist, typically every 500–1000 hours, to monitor seal performance and catch signs of leaking seals early. Train operators to report symptoms like sluggish performance or fluid drips, supporting proactive maintenance and reducing downtime.
Safety Precautions
Safety is critical during hydraulic seal replacement to prevent injury or equipment damage:
- Depressurize Fully: Release all system pressure before starting work to avoid high-pressure fluid sprays, which can cause severe injury or chemical burns.
- Lockout-Tagout: Follow protocols to isolate the equipment and prevent accidental startup during maintenance.
- Use PPE: Wear gloves, safety glasses, and protective clothing to guard against fluid exposure, sharp edges, or chemical hazards.
- Handle Fluids Safely: Dispose of old hydraulic fluid and seals according to environmental regulations to avoid fines or contamination. Use spill containment kits for large systems.
- Avoid Shortcuts: Never reuse old seals or skip bleeding the system, as these increase the risk of failure and injury.
Common Mistakes to Avoid
Even experienced technicians can make errors during installing hydraulic seals. Avoid these pitfalls to ensure success:
- Using Mismatched Seals: Installing a seal with the wrong size, material, or pressure rating leads to immediate leaks or premature wear. Always verify specifications.
- Forcing Seals: Pushing seals into place with excessive force can cause twisting or tearing. Use proper tools like installation cones for tight fits.
- Contamination: Dirty tools, hands, or workspaces introduce debris that damages seals. Maintain a clean work area and clean components thoroughly.
- Over- or Under-Tightening: Incorrect torque on bolts or fittings distorts seals or causes leaks. Use a torque wrench and follow manual guidelines.
- Ignoring Root Causes: If the old seal showed damaged hydraulic seals from contamination or overheating, address these issues (e.g., replace filters, check fluid quality) to protect the new seal.
- Skipping System Bleeding: Air in the system causes cavitation, stressing seals and reducing performance. Always bleed thoroughly.
Troubleshooting Post-Installation Issues
If issues arise after hydraulic seal replacement, use these troubleshooting steps:
- Leaks Detected: Check for improper seal orientation, pinched seals, or damaged sealing surfaces. Re-disassemble and inspect, replacing the seal if necessary.
- Sluggish Performance: Indicates internal leaks or air in the system. Re-bleed the system and verify seal installation. Conduct a pressure test to confirm integrity.
- Overheating: Use an infrared thermometer to pinpoint hot spots. Misaligned seals or contaminated fluid may cause friction. Check fluid quality and re-install if needed.
- Unusual Noises: Whining or hissing suggests air intrusion or seal bypass. Re-check installation and bleed the system. If persistent, replace the seal and inspect for component damage.
Best Practices for Long-Term Seal Performance
To maximize seal life and prevent hydraulic seal failure, adopt these proactive strategies:
- Source Quality Seals: Use OEM or certified aftermarket seal kits from JSP Seal Kits to ensure durability and compatibility. Their kits for brands like Soosan, Atlas Copco, and Furukawa are designed for harsh conditions.
- Follow a Maintenance Schedule: Inspect seals, fluid levels, and filters every 500–1000 hours using a hydraulic maintenance checklist. Regular checks catch issues early.
- Replace Wiper Seals Proactively: Wiper seals block contaminants, a major cause of seal wear. Swap them every 500 hours or as recommended.
- Monitor Fluid Quality: Contaminated or degraded fluid accelerates seal wear. Change fluid and filters per manufacturer guidelines and test samples for metal or water content.
- Train Technicians: Invest in training to teach proper installing hydraulic seals and system maintenance. A $500 course can save thousands by preventing errors.
- Use Condition Monitoring: Advanced systems ($1000–$5000) track pressure, temperature, and fluid quality in real-time, alerting you to seal issues before failure.
Where to Get Quality Replacement Seals
For reliable breaker seal replacement and hydraulic seal kits, JSP Seal Kits is the industry’s trusted source. They offer seal kits for top brands like Soosan, Atlas Copco, and Furukawa, using high-quality materials such as Viton, NBR, polyurethane, and PTFE, built to withstand construction, demolition, and mining environments. Their fast shipping minimizes downtime, and expert support ensures you select the right seals for your equipment. Contact their team for personalized advice on hydraulic seal replacement compatibility and installation.
Frequently Asked Questions
How long does hydraulic seal replacement take?
A straightforward replacement takes 1–3 hours, depending on component complexity and technician experience. Complex systems like large breakers may take longer.
Can I reuse a hydraulic seal?
No, always replace seals. Reused seals are prone to leaks and failure, risking system damage.
What causes seals to fail after installation?
Common causes include improper installation (misalignment, pinching), contamination, or using mismatched seals. Address these during installing hydraulic seals.
How do I know if I installed the seal correctly?
Post-installation tests (leak checks, pressure tests, performance monitoring) confirm proper installation. No leaks, normal operation, and stable pressure indicate success.
Are aftermarket seals reliable?
Yes, if sourced from reputable suppliers like JSP Seal Kits, which use premium materials for heavy equipment.
Conclusion
Proper hydraulic seal replacement is critical to maintaining equipment reliability, preventing hydraulic fluid leaks, and avoiding costly downtime. By following these detailed steps—preparing the workspace, installing seals correctly, and testing thoroughly—you can ensure your hydraulic systems perform at their best. Avoiding common mistakes, addressing seal failure causes, and using quality seal kits from JSP Seal Kits will extend seal life and protect your investment. Don’t let a poorly installed seal derail your operations. Act now to master installing hydraulic seals and keep your equipment running strong. Download our free “Hydraulic Seal Installation Checklist” from JSP Seal Kits for a handy reference during maintenance.